Salesforce Lightning Configuration #
The following configuration is required within Salesforce to add ~.UcClient.~ support.
- Add ~.UcClient.~ as a Salesforce 'Call Centre Adapter'
- Add the 'Open CTI Softphone' to the required Salesforce applications
- Configure which users are to use the ~.UcClient.~ client
To perform each of the configuration steps below, you will need to be logged into Salesforce.com with administrative permissions.
Add ~.UcClient.~ as a Call Centre adapter #
The ~.UcClient.~ client needs to be added as a 'Call Centre Adapter' within Salesforce.
To add an adapter, please follow these steps:
-
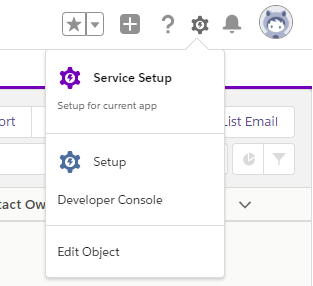
Access the 'Setup' area
-
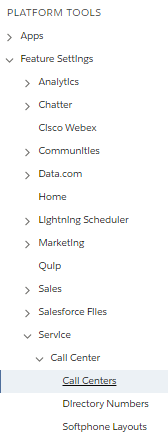
Navigate to 'PLATFORM TOOLS\Feature Settings\Service\Call Centre\Call Centers'
-
Press the 'Import' button at the top of the 'All Call Centers' grid
-
Download the correct '~.UcClient.~ Lightning Adapter' XML file for your region to your local computer:
- Australia -> ConnectLightningAdapterAU.xml
- Canada -> ConnectLightningAdapterCA.xml
- Ireland -> ConnectLightningAdapterIE.xml
- New Zealand -> ConnectLightningAdapterNZ.xml
- United Kingdom -> ConnectLightningAdapterUK.xml
- United States -> ConnectLightningAdapterUS.xml
-
Press the 'Choose file' button and browse for the file you downloaded in the previous step.
-
Press the 'Import' button to complete the import
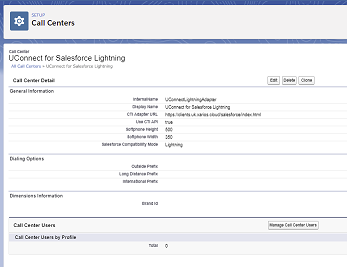
The Call Centre adapter should now be configured and ready for use.
tip
After importing, the 'Call Centre adapters' screen will be open. This allows you to skip straight to step 2 of the Multiple User setup below.
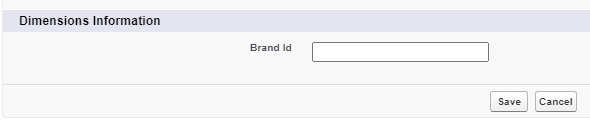
Custom Branding #
~.UcClient.~ will automatically download the correct branding for the logged in user. To apply a specific brand before a user has logged in, populate the Brand Id parameter on Call Centre Adapter with the account id of a Dimensions Enterprise or Reseller account with the appropriate branding.
Add a Trusted URL #
If the 'Adopt updates CSP directives' settings is checked, the client URL needs to be added to the 'Trusted URLs area.
Repeat the steps below for all entries in the URL table (using the region relevant to your deployment):
-
Navigate to 'PLATFORM TOOLS\Security\Network Access'
-
Select the 'Trusted URLs' page
-
Click on the 'New Trusted URL' button
-
Enter the following details:
- API Name: {see table below}
- URL: {see table below}
- Description: ~.UcClient.~ Client
- Active: Yes
- frame-src: Yes
-
Click on the 'Save' button
URL Table #
| API Name | URL |
|---|---|
| idp | *.xarios.cloud |
| idp_region | *.{REGION}.xarios.cloud |
| client | .{REGION}.myreports.cloud (e.g..uk.myreports.cloud) |
tip
Regions: na - North America, au - Australia & New Zealand, uk - United Kingdom, eu - Europe
Add the Call Centre adapter to users #
Once the Call Centre adapter has been added, it needs to be assigned to the users which require access to it. This can be done in two different ways, you can assign a Call Centre adapter to a user or you can assign multiple users at once to a Call Centre adapter.
info
Once user have been assigned to the ~.UcClient.~ adapter, ensure they refresh their browser (Shift-F5) so that the ~.UcClient.~ client is loaded.
Multiple Users #
To assign the Call Centre adapter to multiple users, follow the steps below.
-
Staying in the 'Setup' area, navigate to 'PLATFORM TOOLS\Feature Settings\Service\Call Centre\Call Centers'
-
Select ~.UcClient.~ for Salesforce Lightning App
-
Towards the bottom of the screen press the 'Manage Call Centre Users' button.
-
On the 'Manage Users' form, press the 'Add More Users' button.
-
Use the search tools provided to locate the users which require access to ~.UcClient.~.
-
Check the box against each user and press the 'Add to Call Centre' button.
This step can be repeated for each user who requires access to the ~.UcClient.~ client.
Single User #
To assign the Call Centre adapter to a single user, follow the steps below.
info
This option may not be available in all versions of Salesforce. If you cannot find the Call Centre option under an individual user, use the previously documented method of assigning the Call Centre adapter to users instead.
-
Staying in the 'Setup' area, navigate to 'ADMINISTRATION\Users\Users'
-
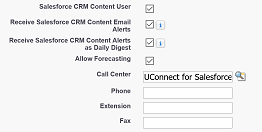
Select 'Edit' against a specific user
-
Press the magnifying glass icon next to the 'Call Centre' property and then select '~.UcClient.~ for Salesforce Lightning' in the form which opens
-
Select the 'Save' option to save the settings against the user
The user should now be configured to use the adapter the next time they open the configured application.
This step can be repeated for each user who requires access to the ~.UcClient.~ client.
Add Open CTI Softphone Utility Item #
The Open CTI Softphone now needs adding to which ever Lightning applications the ~.UcClient.~ client needs to be accessed from.
-
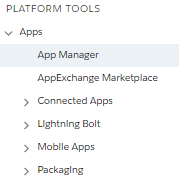
Staying in the 'Setup' area, navigate to 'PLATFORM TOOLS\Apps\App Manager'
-
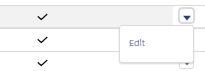
A grid of Lightning applications should be displayed in the main area. Against an application, press the down arrow in the far right column and select 'Edit' from the menu, e.g. Sales Console.
-
The 'Lightning App Builder' should now be displayed. Navigate to 'Utility Items (Desktop Only)'
-
If the '~.UcClient.~' option is not already visible, press 'Add Utility Item' and select 'Open CTI Softphone' from the list.
-
Update the label on the utility from 'Phone' to '~.UcClient.~'
-
Press the 'Save' button at the bottom of the page then press '<- Back' in the top-right corner.
The Phone utility should now be added to the selected Lightning application. Repeat steps 2 through 6 for all Lightning applications which require the Phone utility to be exposed.
tip
The dialer utility within Salesforce also has the label 'Phone'. Do not confuse this utility with the Open CTI Softphone one.
info
The ~.UcClient.~ client will only work with Lightning applications, not Classic.